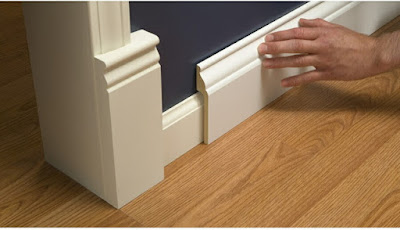
 If you have recently purchased an Irvine home for sale and
want to give a touch of enhancement to its interiors, new baseboards can add up
to the final finishing touch your home truly deserves. Making a firm decision
with dedication transforms a living space from average to amazing, not denying
the fact that baseboards play an important role in a home’s overall look. From
removing existing baseboards to installing the new trim, these steps will guide
to for your new DIY project to have a professional finished look.
If you have recently purchased an Irvine home for sale and
want to give a touch of enhancement to its interiors, new baseboards can add up
to the final finishing touch your home truly deserves. Making a firm decision
with dedication transforms a living space from average to amazing, not denying
the fact that baseboards play an important role in a home’s overall look. From
removing existing baseboards to installing the new trim, these steps will guide
to for your new DIY project to have a professional finished look.1. Remove Old Trim
Use a sharp blade or a box cutter to remove the top of
the
trim, where caulking and paint accumulate. You can either use a pry bar or a
wedge to separate old baseboards very carefully as it may damage the drywall
surfaces and the old material may fall out with attached nails. The main
attempt is to prevent anything from breaking. Try using a sandpaper and a paint
scraper to clean the surface.2. Take Right Measurements
Take your time to measure carefully and perform measurements
twice at a minimum for each side of the wall. Round up the measurements and add
at least three inches in height to your selected baseboard to have a room for
cutting. Don’t forget that outside corners need adding some extra space for
measurements. Before going to the store for baseboards, add at least 7 percent
to the length.
3. Paint
Normally, you can be able to find painted or at least primed
baseboards that you can purchase and leave in your home for several days so it
can get used to the indoor climate. In the meantime, you can paint the walls
and allow them to completely dry. If you are unable to find painted baseboards,
you can prime and paint them before installation.
4. Level
In most cases, the floor is leveled, but sometimes it is
not. You can utilize a traditional bubble or laser level to know the lowest
point, take measurements of the baseboard height against the wall, and draw a
horizontal line to mark left and right sides and again use a level to make a
straight line across. This will be the location your baseboards will rest at
the time of installation.
5. Cut the Baseboards
Scarf joints are required to marry two long pieces. It will
be wiser to ask store clerks to determine whether or not you need these joints
according to your measurements as they can do it with the miter saws. The same
is also applied for the inside corners as they need bevel cuts.
6. Fit the Baseboards
Check and test all the joints that they marry correctly
before you apply the glue at the back of the baseboards. You must glue the long
pieces at the joint before gluing them to the wall. Adherence will take a few
minutes after which you can hammer baseboards in place with finish nails. The
baseboards may have gaps and hole, which you can fill and cover using wood
filler before sanding slightly and applying the last coat of paint.
Author: April Lavine is a real estate agent broker in Irvine. She currently works with Irvine Residential Living, Orchard Hills homes, condos, townhomes for sale
Comments
Post a Comment